


If you’re trying to find a craft that’s simple, fun, and constantly adjustable, Shrinky Dinks could just be what you need. These sets let you transform your drawings right into sturdy, small plastic developments – best for jewelry, charms, designs, and extra. It’s a satisfying means to share imagination, whether you’re a newbie or a skilled crafter.
Why Shrinky Dinks Stand Out
Shrinky Dinks have been prominent for many years, and their allure hasn’t discolored. The plastic sheets in these packages shrink equally when baked, preserving vibrant shades and tidy edges. Unlike various other crafts, they provide an accessible method to develop top notch, sleek results with just a couple of devices.
Costs Materials for Perfect Results
The plastic sheets in Shrinky Dinks sets are made to diminish smoothly without splitting or shedding detail. Each sheet guarantees your art work retains its vibrancy and holds its form.
Versatility for each Idea
Shrinky Dinks are ideal for a vast array of jobs. From personalized keychains to bold fashion jewelry layouts, these packages allow you craft useful, decorative, or whimsical items that are totally your own.
Vibrant and Detailed Creations
With Shrinky Dinks’ colored pencils and fine-tip pens, you can add complex information to your designs. As the shrinking procedure improves information and color saturation, your completed pieces will certainly attract attention a lot more.
Exactly how to Create with Shrinky Dinks
Making Shrinky Dinks is straightforward and satisfying. The process is easy enough for kids however creative adequate to maintain grownups involved.
Step 1: Design Your Art
Begin by drawing your style directly onto the plastic sheet making use of the pencils or markers consisted of. You can freehand, trace existing pictures, and even layer colors for even more depth.
Action 2: Cut Your Pieces
Thoroughly cut out your styles, leaving a tiny border for a refined appearance. Precision right here makes a huge difference in the outcome.
Step 3: Bake to Shrink
Pre-heat your oven to the suggested temperature level, area your cutouts on a parchment-lined cooking sheet, and cook. Watch as the sheets crinkle, diminish, and harden into durable plastic.
Tip 4: Turn Your Creations Into Finished Pieces
When cooled, your miniatures are ready for use. Affix them to keychains, turn them into pendants, or use them as ornamental accents. The possibilities are just restricted by your creativity.
Why Use an Oven, Not a Microwave?
Although it may seem convenient to attempt cooking Shrinky Dinks in a microwave, this isn’t advised. Microwaves heat erratically, which can warp or thaw the plastic unpredictably. A traditional stove offers even warm, guaranteeing your styles diminish evenly and retain their form.
Creative Ideas for Your Shrinky Dinks
The elegance of Shrinky Dinks lies in their flexibility. Whether you’re wanting to make something practical or decorative, they’ve got you covered.
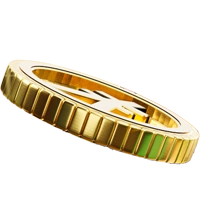
Precious jewelry and Accessories
Layout custom jewelry, pendants, or bracelets that are light-weight yet resilient. These customized items make excellent presents or distinct enhancements to your closet.
Charms and Decorations
Create colorful appeals to embellish bags, keychains, or even vacation accessories. The lively shades and durable surface make them a standout enhancement to any type of collection.
Tips for Professional Results
For the best end result, focus on a couple of small details. Usage fine-tip markers or high-quality pencils for tidy lines and precise information. Preheating your stove guarantees the plastic reduces equally, and testing tiny designs first can help you perfect your technique before tackling larger items.
Start Your Shrinky Dinks Adventure
At The Shrinky Dinks Store, you’ll find everything you need to get going. From frozen sheets to crystal-clear choices and themed packages like Shrinky Dinks Hello Kitty, there’s something for everyone. Whether you’re crafting alone or with a team, Shrinky Dinks makes creativity very easy and fun.